
Balanceamento de Circuitos de Piso Radiante: Ajuste Cada Medidor de Fluxo Corretamente
Balanceie um manifold de piso radiante com aritmética, não com suposições. Derive o L/min de cada circuito a partir de Q = m x cp x dT, aplicado em um projeto real de seis circuitos.
A argamassa foi aplicada em março. A caldeira está dimensionada, a bomba está funcionando, cada atuador abre quando seu termostato solicita — e o quarto dos fundos do cliente está a 17 °C enquanto o corredor, que ninguém ocupa, está desconfortavelmente quente. O instalador aumenta o termostato do quarto. Nada acontece, porque nada em um termostato pode mover água que já escolheu um caminho diferente.
Esse trabalho não tem um problema de calor. Tem um problema de distribuição, e a solução é um conjunto de números que deveriam ter existido antes de o tubo ser fixado: uma vazão alvo, em litros por minuto, para cada circuito no manifold.
Quase todos os guias sobre balanceamento de piso radiante dirão que esses números geralmente ficam entre 1 e 3 litros por minuto. Isso é verdade, e é inútil, porque é uma média das casas de outras pessoas. O que nenhum deles mostra é como obter o número para o seu ambiente — a aritmética que transforma uma carga térmica em watts em uma leitura no medidor de vazão. Este artigo escreve essa aritmética por extenso, prova-a contra a tabela de comissionamento publicada por um fabricante e, em seguida, executa um manifold completo de seis circuitos em duas condições de projeto diferentes.
- A vazão do circuito vem de uma equação: Q = m × cp × ΔT, reorganizada para dar litros por minuto. Todo o resto nesta página é essa equação aplicada.
- O ΔT de projeto é tipicamente em torno de 10 K em uma caldeira e 5 K em uma bomba de calor. Reduzir o ΔT pela metade dobra a vazão que cada circuito precisa — mesma casa, mesmo calor, o dobro de água.
- Derivada dos primeiros princípios, a equação reproduz todos os nove valores na tabela de vazão de circuito publicada por um fabricante nomeado dentro de 3,5 %. Essas tabelas não são conhecimento proprietário; são esta aritmética com o arredondamento feito para você.
- EN 1264-3:2021 é o que você usa para dimensionamento; EN 1264-4:2021 é o que você usa para instalação e comissionamento. Ambos foram publicados em 31 de maio de 2021.
- Manter os circuitos dentro de aproximadamente 10–15 % uns dos outros em comprimento é uma prática comercial que vale a pena seguir — mas não pode salvar um ambiente que precisa de alta potência através de um circuito curto, e o exemplo trabalhado abaixo mostra exatamente esse caso.
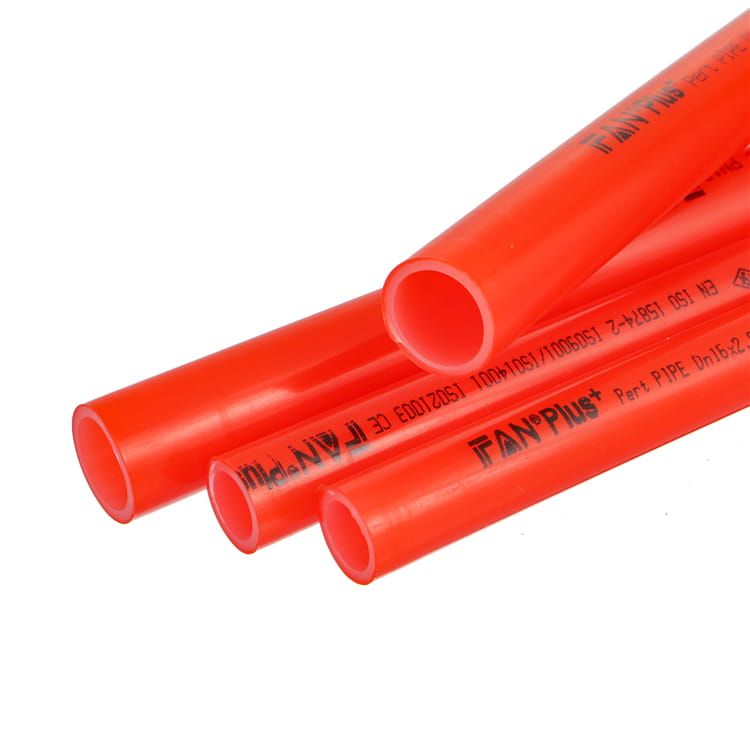
O que o balanceamento realmente corrige: uma bomba, seis circuitos, resistência desigual
Um manifold é um circuito paralelo. Uma bomba empurra água para uma barra de fluxo, essa água se divide entre quantos circuitos estiverem conectados e se recombina na barra de retorno. Nada nessa disposição força a divisão a ser justa.
A água se divide entre caminhos paralelos em proporção inversa à sua resistência, e a resistência de um circuito aumenta com seu comprimento. Portanto, um circuito de corredor de 26 m e um circuito de sala de estar de 92 m ligados ao mesmo manifold não recebem vazões semelhantes — o curto recebe muito mais do que sua parcela e o longo fica subalimentado. O corredor superaquece. A sala de estar nunca atinge o setpoint. Ambas as falhas têm uma única causa.
É por isso que aumentar o termostato não resolve. Um termostato apenas decide se seu atuador abre; ele não tem autoridade sobre quanto da saída da bomba passa por aquele port específico uma vez que está aberto. Se o circuito está hidraulicamente subalimentado, abri-lo por mais tempo apenas o subalimenta por mais tempo.
Os dois ajustes, e qual você realmente usa
Quase todo manifold moderno oferece dois dispositivos por circuito, e eles não são intercambiáveis:
- O medidor de vazão (topmeter) na barra de fluxo — um flutuador em um tubo graduado que exibe e ajusta os litros por minuto que passam por aquele circuito. Este é o dispositivo de balanceamento. É este que você ajusta.
- A válvula de retorno na barra de retorno — o port que carrega o atuador térmico e recebe o comando on/off do termostato ambiente. Este é um dispositivo de controle, não um dispositivo de balanceamento.
Confundir os dois é a forma mais comum de um manifold acabar "balanceado" por meio do estrangulamento das válvulas de retorno, o que produz um sistema que parece funcionar até que os atuadores comecem a ciclar e os ajustes silenciosamente deixem de significar qualquer coisa.
Qual norma rege qual decisão
Duas partes da mesma série de normas europeias cobrem este trabalho, e misturá-las leva as pessoas a procurar regras de projeto no documento de instalação.
| Norma | Título | O que ela decide para você |
|---|---|---|
| BS EN 1264-3:2021 publicada em 31 de maio de 2021 |
Sistemas de aquecimento e resfriamento superficiais embutidos à base de água — Dimensionamento | O lado do projeto: como o sistema é dimensionado, incluindo perda de pressão. É daqui que vêm os valores de vazão. |
| BS EN 1264-4:2021 publicada em 31 de maio de 2021 |
Sistemas de aquecimento e resfriamento superficiais embutidos à base de água — Instalação | O lado do canteiro: requisitos para o projeto e construção da estrutura do piso, e o procedimento de teste de estanqueidade. |
Um detalhe da revisão de 2021 importa se você estiver trabalhando com um método de projeto mais antigo. Em comparação com a edição de 2009, a EN 1264-3:2021 adicionou quatro novas subcláusulas de perda de pressão — 4.1.3.1, 4.2.3.1, 4.3.3.1 e 5.2.1.1 — portanto, a resistência hidráulica é tratada de forma mais explícita na base de dimensionamento atual do que antes. Se seu material de referência for anterior a essa revisão, o tratamento de perda de pressão que ele fornece é o mais antigo. Ambas as partes são publicadas pela BSI como Normas Britânicas; a entrada de catálogo para a parte 3 lista o registro completo de alterações.
A Equação por Trás de Toda Tabela de Vazão de Circuito
Aqui está a coisa toda. Um circuito tem que entregar um certo número de watts em um ambiente, e ele faz isso chegando quente e saindo mais frio. Quanta água ele precisa depende de quanto ele pode esfriar no caminho.
Q = m × cp × ΔT
Q = calor fornecido (kW) · m = vazão mássica (kg/s) · cp = capacidade térmica específica da água (kJ/kg·K) · ΔT = queda de temperatura entre ida e retorno (K)
Você conhece Q, pois é a necessidade de calor do ambiente. Você escolhe ΔT, pois ele decorre da sua fonte de calor. Então, reorganize para a variável que você não conhece:
m = Q / (cp × ΔT)
Isso dá quilogramas por segundo. Um medidor de vazão lê litros por minuto, então divida pela densidade para obter metros cúbicos por segundo e multiplique por 60.000 para chegar a litros por minuto.
As duas constantes e por que você pode parar de se preocupar com elas
Ambas as constantes variam com a temperatura, o que levanta uma questão óbvia: em qual temperatura você as avalia? A resposta honesta é que, para este fim, isso quase não importa, e vale a pena entender o porquê em vez de apenas aceitar que deve ignorar.
| Temperatura da água | cp (kJ/kg·K) | Densidade (kg/m³) |
|---|---|---|
| 20 °C | 4.1834 | 998.30 |
| 40 °C (fluxo típico de piso radiante) | 4.1789 | 992.30 |
| 50 °C | 4.1809 | 988.12 |
| 60 °C | 4.1845 | 983.28 |
Em toda a faixa em que um sistema de piso radiante opera, cp varia apenas 0,14 % — é efetivamente uma constante, e usar 4.1789 kJ/kg·K em todos os casos introduz um erro muito menor do que o seu cálculo de perda de calor já carrega. A densidade cai mais, 0,60 % entre 20 °C e 40 °C, e é por isso que tratar um litro como um quilograma é um atalho, não uma identidade. Na precisão de comissionamento, em um medidor de flutuador que você lê a olho contra uma escala impressa, é um atalho perfeitamente aceitável. Vale saber que é um atalho.
O cálculo em uma linha
Juntando a conversão, você obtém uma fórmula que pode guardar:
Vazão (L/min) = Q(W) ÷ (4.1789 × ΔT) ÷ 992.30 × 60
Exemplo prático: um banheiro de 1.400 W com ΔT de 5 K. 1,4 kW ÷ (4.1789 × 5) = 0,0670 kg/s. Divida por 992.30 → 0,0000675 m³/s. Multiplique por 60.000 → 4,05 L/min.
Prova de que a equação está correta: reconstruindo a tabela de comissionamento de um fabricante
Uma fórmula em um artigo vale muito pouco por si só. Então, aqui está um teste que qualquer pessoa pode repetir.
O guia de instalação de piso radiante da Uponor Underfloor Heating Installation Guide traz uma tabela de comissionamento na página 51 com a vazão de projeto para um circuito, indexada pelo comprimento do circuito e pela potência térmica do piso. Ela é apresentada como uma consulta — sem derivação, sem explicação, apenas números que se espera que o instalador aceite. Em outra parte do mesmo documento, na página 33, a empresa declara a base de projeto por trás de suas tabelas: um ΔT de 7,5 °C, com o tubo de 16 mm assentado a 200 mm de espaçamento.
Isso é tudo que é necessário para verificar a aritmética. Tubo a 200 mm de espaçamento significa que um metro de tubo atende 0,2 m² de piso, então a área atendida por um circuito é seu comprimento × 0,2. Multiplique pela potência em W/m² para obter os watts do circuito e, em seguida, aplique a equação com ΔT de 7,5 K.
| Comprimento do circuito | Potência do piso | Derivado aqui | Uponor p.51 | Diferença |
|---|---|---|---|---|
| 50 m | 50 W/m² | 0,96 L/min | 1,0 L/min | −3,5 % |
| 50 m | 70 W/m² | 1.35 L/min | 1.4 L/min | −3.5 % |
| 50 m | 100 W/m² | 1.93 L/min | 2.0 L/min | −3.5 % |
| 75 m | 50 W/m² | 1.45 L/min | 1.5 L/min | −3.5 % |
| 75 m | 70 W/m² | 2.03 L/min | 2.1 L/min | −3.5 % |
| 75 m | 100 W/m² | 2.89 L/min | 3.0 L/min | −3.5 % |
| 100 m | 50 W/m² | 1.93 L/min | 2.0 L/min | −3.5 % |
| 100 m | 70 W/m² | 2.70 L/min | 2.8 L/min | −3.5 % |
| 120 m | 50 W/m² | 2.32 L/min | 2.4 L/min | −3.5 % |
Nove valores em nove, todos 3,5 % abaixo do valor publicado — e note que é o mesmo 3,5 % em todas as vezes, não uma dispersão. Um deslocamento constante em nove linhas independentes é a assinatura de uma margem de projeto deliberada, e não de erro acumulado: o fabricante está arredondando para cima — na direção segura, porque um circuito com fluxo ligeiramente excessivo tem desempenho invisível, enquanto um com fluxo insuficiente deixa o ambiente frio.
A conclusão importa mais do que o exercício. Essas tabelas publicadas não são engenharia proprietária; são esta equação com o arredondamento já aplicado e as premissas de projeto embutidas. O que significa que, no momento em que seu projeto diferir das premissas da tabela — um ΔT diferente, espaçamentos diferentes, um ambiente cuja carga não seja 50, 70 ou 100 W/m² — a tabela deixa de se aplicar e a equação continua valendo.
Um Coletor de Seis Circuitos Dimensionado, Balanceado a 5 K e 10 K
Aqui está um projeto completo. Seis circuitos em um coletor, cargas térmicas reais, comprimentos reais. Tudo nas duas colunas à direita é a equação anterior — nada é consultado.
| Circuito | Carga térmica | Comprimento do circuito | Fluxo a ΔT 10 K (caldeira) |
Fluxo a ΔT 5 K (bomba de calor) |
|---|---|---|---|---|
| Sala de estar A | 1.200 W | 46 m | 1,74 L/min | 3,47 L/min |
| Sala de estar B | 1.200 W | 46 m | 1,74 L/min | 3,47 L/min |
| Cozinha / sala de jantar | 1.750 W | 68 m | 2,53 L/min | 5,06 L/min |
| Quarto 1 | 1.150 W | 45 m | 1,66 L/min | 3,33 L/min |
| Quarto 2 | 980 W | 38 m | 1,42 L/min | 2,84 L/min |
| Banheiro | 1.400 W | 42 m | 2,03 L/min | 4,05 L/min |
| Total do coletor | 7.680 W | 285 m | 11,11 L/min 0,667 m³/h | 22,22 L/min 1,333 m³/h |
O que as duas colunas estão lhe dizendo
Mesma casa. Mesmos 7.680 W. A bomba tem que mover exatamente o dobro de água na coluna da direita em relação à esquerda, e este é o fato mais consequente desta página.
O ΔT de projeto decorre da fonte de calor, e assim também o tubo que você especifica para transportá-lo — ponto que aprofundamos em nossa comparação de PE-RT e PEX para piso aquecido. Um sistema de caldeira é tipicamente projetado em torno de 10 K — fluxo a 50 °C, retorno a 40 °C — enquanto uma bomba de calor é tipicamente projetada em torno de 5 K, fluxo a 40 °C e retorno a 35 °C, porque a queda mais estreita permite que a máquina opere a uma temperatura de fluxo mais baixa e com melhor coeficiente de desempenho. Esses são valores de projeto convencionais, e não requisitos de qualquer norma, e vale notar que a tabela do fabricante dissecada acima fica entre eles, a 7,5 K.
A consequência não é nada convencional: substituir uma caldeira por uma bomba de calor em um manifold existente dobra a demanda de vazão em cada circuito. Uma circuladora que operava confortavelmente a 0,667 m³/h agora precisa fornecer 1,333 m³/h contra uma resistência maior, pois a perda de carga aumenta aproximadamente com o quadrado da vazão. Retrofits falham aqui regularmente, e a falha se parece exatamente com a do parágrafo de abertura — alguns ambientes ok, os mais distantes frios.
O circuito que a regra prática de ninguém salva
Agora observe o banheiro e divida a vazão de cada circuito pelo seu comprimento para ver o quão intensamente cada metro de tubo está trabalhando:
| Circuito | Vazão por metro de circuito, a ΔT 5 K |
|---|---|
| Sala de estar A / B | 75,5 ml/min |
| Cozinha / sala de jantar | 74,5 ml/min |
| Quarto 1 | 74,0 ml/min |
| Quarto 2 | 74,6 ml/min |
| Banheiro | 96,5 ml/min |
Cinco circuitos se agrupam em torno de 75 ml/min por metro. O banheiro está 29 % acima de todos — ele precisa da maior vazão de qualquer ambiente, exceto a cozinha, entregue através de um dos circuitos mais curtos, porque banheiros têm alta perda de calor e uma temperatura de piso alvo mais alta em uma área pequena.
Este é o caso que o conselho popular não consegue lidar. "Mantenha seus circuitos dentro de 10–15 % uns dos outros em comprimento" é uma orientação sólida e é discutida adequadamente na próxima seção, mas é uma regra sobre comprimento, e o problema do banheiro é watts por metro quadrado. Seu circuito já tem um comprimento sensato. Torná-lo mais longo para igualar aos outros pioraria as coisas, não melhoraria, porque você estaria adicionando resistência ao circuito que já precisa da maior vazão.
O que o banheiro realmente precisa é ser reconhecido no momento do projeto como o circuito hidraulicamente exigente e tratado de acordo: mantido curto, próximo ao manifold, e recebendo a altura manométrica da bomba que necessita. Se você só descobrir isso no comissionamento, suas opções se reduzem à bomba.
Ajustando os Medidores de Vazão Sem Perseguir Seus Próprios Ajustes
Com um cronograma de vazão em mãos, o trabalho físico é simples — desde que feito na ordem correta. A ordem é o que impede você de passar a tarde perseguindo ajustes ao redor do manifold.
- Encha, ventile e ligue a bomba antes de tocar em qualquer coisa. Ar em um circuito lê como baixa vazão e fará você ajustar uma válvula para corrigir um problema que não é hidráulico.
- Feche cada medidor de vazão completamente. Todos eles, antes de começar. Um manifold parcialmente aberto não dá ponto de referência.
- Feche todas as válvulas de retorno — remova os atuadores térmicos e instale as tampas manuais, para que os circuitos fiquem sob seu controle, não sob o do termostato.
- Abra a válvula de retorno de um circuito e depois abra seu medidor de vazão de totalmente fechado até ler o alvo daquele circuito. Com o sistema e as bombas funcionando.
- Repita para cada circuito e depois faça uma segunda passada. A segunda passagem não é opcional — veja abaixo.
- Reinstale os anéis de travamento e, em seguida, os atuadores. Um anel de travamento corretamente instalado significa que o medidor não girará, o que impede que as configurações se desviem posteriormente.
- Registre cada valor final na etiqueta do manifold. Caso contrário, a próxima pessoa que abrir esse armário não terá como saber as vazões de projeto.
Por que a segunda passagem é obrigatória
Os circuitos em um manifold compartilhado são hidraulicamente acoplados. Ao abrir o circuito 4, você altera a pressão disponível para os circuitos 1, 2 e 3 — a vazão que você ajustou cuidadosamente no circuito 1 não é a vazão que o circuito 1 terá quando todo o manifold estiver aberto. A Uponor afirma isso claramente no mesmo capítulo de comissionamento: repita o processo para cada circuito e, em seguida, volte e faça ajustes finos, pois cada circuito terá um efeito mútuo sobre os outros.
Na prática, uma passagem completa mais uma passagem de ajuste fino é suficiente para um manifold de seis circuitos. Pular a segunda passagem é a razão mais comum para um manifold "balanceado" ainda ter um ambiente frio.
Quando o ajuste acaba
O medidor de vazão tem curso finito. No topmeter da Uponor, três voltas completas a partir do fechamento significam totalmente aberto e não é possível ajustar mais — e todo medidor de flutuador tem algum limite equivalente. Isso transforma um aborrecimento em um diagnóstico genuinamente útil.
Se um circuito está totalmente aberto, todos os outros circuitos estão ajustados corretamente, e ainda assim não atinge a meta, o problema não é o circuito. Você ficou sem autoridade hidráulica, e a resposta está a montante: velocidade da bomba ou um projeto que exige mais desse circuito do que a bomba pode fornecer. A orientação da Uponor diz o mesmo — se o topmeter ou a válvula de bloqueio estiver totalmente aberto e a vazão de projeto não for alcançada, pode ser necessário ajustar a velocidade da bomba.
Há um limite relacionado que vale a pena conhecer antes de projetar, não depois — e é um limite que se move, o que pega as pessoas de surpresa. Medidores de vazão tipo flutuador não compartilham uma única escala. O topmeter TM da Uponor é especificado para "ajuste e indicação visual (0–6 l/m)", enquanto topmeters de reposição são amplamente vendidos com 0–5 L/min e unidades de 0–4 L/min são comuns em manifolds de baixo custo. Nada no manifold indica qual você tem até ler a escala impressa.
Isso transforma o cronograma de trabalho em duas tarefas diferentes. Com ΔT 5 K, o circuito da cozinha precisa de 5,06 L/min: legível em um topmeter 0–6 com cerca de 15 % da escala de sobra, e simplesmente impossível de ajustar em um medidor 0–5 ou 0–4. O mesmo cronograma é comissionável em um manifold e impossível em outro, e a diferença é uma especificação de componente que ninguém verifica na fase de projeto.
As tabelas do próprio fabricante mostram a disciplina — a tabela de 16 mm reconstruída anteriormente atinge no máximo 3,0 L/min, e até a tabela superior de 20 mm da Uponor atinge 4,6 L/min para um circuito de 80 m a 100 W/m², ainda dentro da faixa do seu próprio medidor. Verifique a escala no seu manifold específico antes de fixar o cronograma de circuitos. Um circuito que você não consegue ler é um circuito que você não consegue balancear.
Conexão de tubo PEX a uma conexão de compressão de latão — a junta em cada porta do manifold. Vídeo: IFAN Group.
Projetando Comprimentos de Circuito para que o Manifold Possa Ser Balanceado
Tudo acima assume que o cronograma de circuitos é balanceável. Muitos não são, e isso é decidido no papel muito antes de alguém pegar uma chave de fenda.
A regra de comprimentos semelhantes e o que ela realmente proporciona
A regra prática do setor é manter os circuitos em um mesmo manifold dentro de aproximadamente 10–15 % uns dos outros em comprimento. Quando os comprimentos são próximos, os circuitos apresentam resistências semelhantes, o fluxo se divide quase igualmente por conta própria, e as válvulas de balanceamento acabam fazendo muito pouco trabalho — alguns projetistas deixam as válvulas de balanceamento manuais efetivamente totalmente abertas quando os comprimentos estão dentro de cerca de 10 %.
Trate isso como prática de projeto, não como requisito de qualquer norma. O mecanismo por trás disso é real e é a partir dele que você deve raciocinar: quanto maior a dispersão das resistências, mais cada válvula precisa estrangular, e mais da altura manométrica da bomba é deliberadamente destruída para fazer um sistema desigual se comportar. Um manifold cujos circuitos variam de 22 m a 92 m pode tecnicamente ser balanceado. Mas isso desperdiça energia da bomba permanentemente e não deixa margem quando algo muda.
O limite máximo para qualquer circuito
O diâmetro do tubo limita quanta área um único ponto pode atender, porque um circuito mais longo com uma determinada vazão significa mais perda de pressão. Tabelas de projeto publicadas por fabricantes renomados estabelecem comprimentos máximos de circuito na faixa de 80–120 m, dependendo do diâmetro do tubo e da potência do sistema — as tabelas de seleção da Uponor têm linhas de 75 / 100 / 120 m para PEX de 20 × 2 mm e linhas de 80 / 100 / 120 m para multicamada de 16 × 2 mm e PEX de 15 × 1,5 mm, e o guia de projeto da empresa dá 100 m como máximo para 16 mm e 80 m para 12 mm, incluindo os tubos de ida e volta ao manifold.
Essa última cláusula pega muita gente. Uma sala a 15 m do manifold gasta 30 m de sua cota de circuito apenas para ir e voltar, antes que um único metro seja colocado no piso. Abordamos o lado do diâmetro do tubo dessa decisão em mais detalhes em nosso guia sobre escolha de tubo para piso radiante, e as relações de tamanho e pressão nominal em dimensões de tubos PEX.
Dividindo uma sala e o que isso significa para o seu pedido
Quando uma sala excederia o limite, divida-a em dois pontos em vez de forçar um circuito longo de alta resistência. É por isso que o cronograma de exemplo mostra a sala de estar como dois circuitos de 46 m em vez de um único circuito de 92 m — e é o momento em que o projeto do circuito se transforma em uma decisão de compra.
Conte as saídas pelo esquema de loops, nunca pelo número de ambientes. Seis ambientes nesse exemplo produzem seis loops apenas porque a sala de estar absorveu uma saída que o banheiro não precisava; um layout diferente dá uma resposta diferente. Conjuntos de manifold estão disponíveis comercialmente de 2 a 12 saídas, com tipos modulares construídos a partir de seções de 2, 3 e 4 saídas rosqueadas entre si até um máximo de 12 saídas, então a restrição prática geralmente é que você deve decidir antes de pedir, em vez de o hardware não poder acomodá-lo. Se você está escolhendo entre tipos e materiais de manifold, nosso guia de manifold PEX cobre esse lado; as faixas de bobinas e conexões estão no nosso catálogo de produtos.
Antes da argamassa ser aplicada
Uma lista curta, porque tudo nela é impossível de corrigir depois:
- Comprimentos de loop registrados por saída, medidos na bobina, não estimados pela área do piso.
- Vazão alvo calculada por loop, no ΔT que sua fonte de calor real vai operar — não em um valor genérico.
- Cada alvo dentro da faixa legível do medidor de vazão. Se um não estiver, o projeto muda, não a comissão.
- Os ambientes de alta demanda identificados — banheiros e ambientes com grandes envidraçados — e mantidos curtos e próximos ao manifold.
- Teste de estanqueidade concluído conforme EN 1264-4 antes da argamassa, já que essa norma traz o procedimento de instalação e teste de estanqueidade. Peça ao seu fornecedor de bobinas o relatório de teste do lote cobrindo o rolo que você está prestes a enterrar, e em um projeto grande o suficiente para justificar, peça uma bobina de amostra antes da entrega principal para que as conexões e adaptadores do manifold sejam comprovados contra o tubo real antes da obra.
A Lista de Verificação de Decisão
Balanceamento não é um truque. É um cronograma de números, produzido antes da instalação e confirmado na comissão, e a aritmética por trás dele cabe em uma linha.
- Qual é a carga térmica de cada ambiente em watts? Sem isto, nada mais pode ser calculado — e nenhum valor de caudal copiado de uma tabela é válido para o seu edifício.
- Qual será o ΔT real da fonte de calor? Cerca de 10 K para uma caldeira, cerca de 5 K para uma bomba de calor. Se errar isto, todos os valores de caudal ficam errados por um fator de dois.
- Caudal por circuito = Q ÷ (4.1789 × ΔT) ÷ 992.30 × 60. Litros por minuto, por circuito, anotados.
- Todos os valores estão dentro da faixa do medidor de vazão? Se não, divida o circuito ou reveja o ΔT antes de encomendar qualquer coisa.
- Os comprimentos dos circuitos estão dentro de aproximadamente 10–15 %? Se uma divisão exigir um circuito longo, divida-o em duas saídas.
- Qual é o circuito hidraulicamente mais crítico? Normalmente a divisão com maior W/m², não o circuito mais longo. Mantenha-o curto e perto do coletor.
- O coletor já passou pela segunda passagem de equilíbrio? Uma passagem não é um coletor equilibrado.
O hábito mais útil é anotar o esquema de caudais e deixá-lo junto ao coletor. Um sistema equilibrado sem registo está a um passo de se tornar um sistema desequilibrado que ninguém consegue diagnosticar.
Perguntas Frequentes
Qual deve ser o caudal de cada circuito de piso radiante?
Não existe um valor universal — depende da carga térmica da divisão e do ΔT de projeto. Calcule-o: caudal em L/min = watts ÷ (4.1789 × ΔT) ÷ 992.30 × 60. A maioria dos circuitos domésticos fica entre 1 e 3 L/min com ΔT de caldeira, e aproximadamente o dobro com bomba de calor.
Porque é que uma divisão continua fria depois de equilibrar o coletor?
Verifique nesta ordem: ar no circuito, se fez a segunda passagem de equilíbrio e se o medidor desse circuito já está totalmente aberto. Se estiver totalmente aberto e ainda assim abaixo do alvo, o problema é a altura manométrica da bomba ou o projeto, não a válvula.
Qual deve ser o ΔT para piso radiante?
A prática de projeto é cerca de 10 K para sistemas com caldeira e cerca de 5 K para bombas de calor, onde a diferença mais estreita melhora a eficiência da máquina. As tabelas de projeto dos fabricantes situam-se frequentemente entre os dois, cerca de 7.5 K.
Os circuitos de piso radiante têm de ter o mesmo comprimento?
Não idênticos, mas mantê-los dentro de aproximadamente 10–15 % torna o equilíbrio muito mais fácil, porque os circuitos apresentam resistências semelhantes. Quando uma divisão exigir um circuito demasiado longo, divida-o em duas saídas do coletor.
Qual norma cobre o projeto e o equilíbrio de piso radiante?
A EN 1264-3:2021 cobre a dimensionamento — o lado do projeto, incluindo perda de carga. A EN 1264-4:2021 cobre a instalação e o procedimento de teste de estanquidade. Ambas foram publicadas em 31 de maio de 2021.
Quantos circuitos pode um coletor ter?
Os conjuntos de coletores estão normalmente disponíveis de 2 a 12 saídas, com gamas modulares construídas a partir de secções de 2, 3 e 4 vias. Dimensione o número de saídas com base no seu esquema de circuitos, não no número de divisões — divisões divididas consomem saídas extra.