PVC Drainage Pipe Installation: Solvent Welding, Joint Testing & Common Failures
A well-solvent-welded PVC joint is not a glued connection — it is a chemical fusion. The cement dissolves the surface of both the socket and the pipe end, and when they meet the dissolved PVC re-hardens into a monolithic piece of plastic. This guide walks the full installation chain: cement selection by diameter, pipe prep, primer, application, cure times, rubber-ring alternatives, common failures and the tests that catch a bad joint before the walls close.
A well-solvent-welded PVC joint is not a glued connection — it is a chemical fusion. The cement dissolves the surface of both the socket and the pipe end, and when the two surfaces are pushed together the dissolved PVC mixes and re-hardens into a monolithic piece of plastic. Done right, the joint is stronger than the pipe wall itself. Done wrong — dry socket, wrong cement, five-second cure — the joint looks identical, passes the pressure test, and starts to weep six months into service.
This guide walks through the installation chain for a uPVC drainage system: how solvent welding actually works, which cement to pick for each diameter, the pipe prep that separates a good joint from a bad one, application technique, cure times by temperature, when to use rubber-ring bell-and-spigot instead, the six failures we still find on site, and the tests that catch a bad joint before the walls close. Pair it with the PVC drainage pipe sizes guide for the SKU spec and the DWV system design guide for the layout before you cut the first length. This installation article is the how-to spoke inside the complete PVC drainage pillar guide.

Key Takeaways
- Solvent cement is chemical fusion, not glue — the cement dissolves both surfaces so the plastic flows together. A dry joint that "looks the same" is not a joint.
- Match the cement body to diameter: regular-body for DN20-DN75, medium-body for DN75-DN160, heavy-body for DN160+ — thin cement in a big socket runs off before it cures.
- Cut square, deburr inside and out, then chamfer the outside edge to 15° — a raw cut end shoves the socket's melted PVC out of the joint on assembly.
- Apply cement to both surfaces (pipe end AND socket), insert with a quarter-turn, and hold for 30 seconds — release too soon and the joint pushes back apart under residual cement pressure.
- Wait 15 minutes for handling and 24 hours for a full pressure test at 15-20 °C — cold or humid conditions push cure time to 48-72 hours.
- For buried sewer lines DN110+, rubber-ring bell-and-spigot beats solvent weld on both speed and pipe-movement tolerance — solvent weld is for DWV interior work, not underground mains.
How Solvent Welding Actually Works

PVC solvent cement is not glue in the conventional sense. It contains an aggressive solvent — usually tetrahydrofuran, cyclohexanone or methyl ethyl ketone — plus dissolved PVC resin and viscosity modifiers. When you brush it onto a PVC surface, the solvent softens the top 0.1-0.2 mm of pipe wall, dissolving the surface molecules into a viscous layer. When two solvent-wetted surfaces contact under a quarter-turn, the dissolved layers mix. As the solvent evaporates, the polymer chains re-crystallise into one continuous piece of PVC — the joint becomes structurally identical to the pipe wall.
That mechanism is why every step of the technique matters. Cement without dissolved PVC surface is just paint — it dries in place with no fusion, and the joint fails on the first pressure spike. Solvent-only ("cleaner") flashes off in seconds without dissolving enough plastic to matter, which is why cleaner is not a substitute for cement. And once the cement is applied, the window before the solvent evaporates is measured in seconds — apply, insert, quarter-turn, hold, all inside 30 seconds under normal conditions.
One position worth taking: never use "all-purpose" cement on the drainage system. All-purpose products dry harder and faster to be usable on both PVC and CPVC and ABS, but they never dissolve any single material's surface as effectively as a dedicated PVC cement. On a DWV job, spec dedicated uPVC cement for uPVC pipe and take the small SKU-count cost.
Choosing the Right Solvent Cement

PVC solvent cement comes in three body grades, and the split matches diameter. Regular-body cement is thin — it wets thoroughly on small-diameter joints (DN20 to DN75) but runs out of a big socket before the polymer dissolves. Medium-body handles DN75 to DN160, the DWV working range where most contractor jobs live. Heavy-body is thicker and stays in the socket long enough to fuse on DN160 and larger, where the socket volume needs a cement that does not sag on vertical joints.
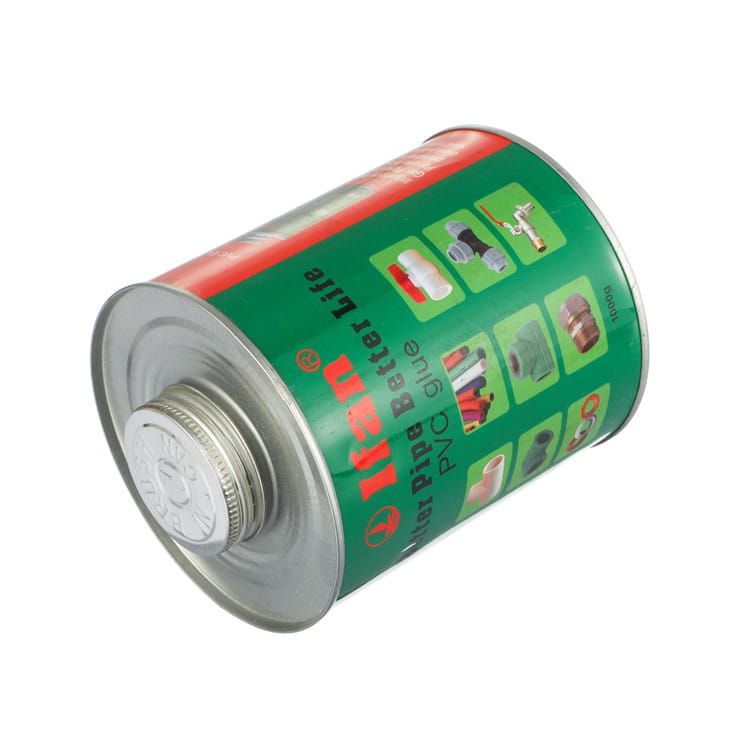
The main brands you will see across trade counters are Weld-On (IPS Corp), Oatey, RectorSeal, Tangit (Henkel), Bostik and Christy's. Under ASTM D2564 the cements are tested against a set of resistance and shear-strength criteria, and any listed cement will perform if the joint prep is right. Match the cement to the pipe schedule, not just the diameter — Schedule 40 uPVC drainage takes standard PVC cement; the heavier schedule 80 pipe used in industrial applications wants an industrial-grade cement rated for the higher solvent load.
Cement body grade by pipe diameter
| Pipe diameter | Cement body | Typical viscosity | Application |
|---|---|---|---|
| DN20 – DN75 | Regular body | 400 – 800 cP | Small DWV branches, basin traps, appliance drains |
| DN75 – DN160 | Medium body | 800 – 1,600 cP | DWV stacks, WC branches, building drains |
| DN160 – DN315 | Heavy body | 1,600 – 3,000 cP | Sewer laterals, storm mains, industrial effluent |
| DN315+ | Heavy body or specialty | 3,000+ cP | Municipal sewer trunk — rubber-ring bell more common |
Cut, Deburr, Chamfer: The Pipe Prep That Matters

Every bad joint on a well-cemented run traces back to bad pipe prep. Three steps decide the outcome. First: cut the pipe square. A ratchet-style PVC cutter is fastest for DN20-DN75; a wheel cutter or a fine-tooth handsaw handles up to DN160; above that, a chop saw with a plastic blade is standard. A crooked cut leaves one side of the socket engaging fully and the other side with a gap the cement cannot bridge.
Second: deburr both edges. The outer edge of the cut end carries a ring of raised plastic that will scrape cement off the socket as the pipe inserts. The inner edge carries a lip that catches debris and forms a growth site for biofilm. A pocket knife around the outer edge, a reamer or the back of the pipe cutter blade on the inner edge, takes under ten seconds and prevents both failures.
Third: chamfer the outer edge to about 15° for roughly 3-5 mm. The chamfer lets the pipe end enter the socket without shoving the dissolved cement out of the joint. Skipping the chamfer is the single most common installer mistake we see on new work — the joint looks fine, the cement wells at the socket rim, and the socket-side fusion is thin and shear-fails under pipe movement.
Priming: When Purple Primer Is Required
Primer is a solvent — usually MEK or acetone — with a purple dye that shows where you applied it. Its job is to open the top layer of PVC surface aggressively, faster than cement alone, so the polymer molecules are already loose when the cement arrives. Under the International Plumbing Code (IPC) section 705 and UPC 316, purple primer is required on every PVC solvent joint in a plumbing system that carries pressure or code-inspected discharge — most US jurisdictions inspect for it. European codes (EN 1329) do not universally require primer, but recommend it for reliable fusion on cold-weather installations.
The purple dye is not a code cosmetic — it is evidence for the inspector that primer was actually applied. In jurisdictions requiring primer, an unprimed joint fails inspection even if the cement joint is otherwise perfect. Apply primer to both the pipe end and the socket, extending 25 mm past the socket depth on the pipe. Apply cement while the primer is still tacky (within 15-30 seconds) — do not let the primer fully dry before cement application.
In warm conditions (over 25 °C), primer flashes off quickly and the working window shortens. Prep only as many joints as one two-person crew can complete in 30 seconds each — priming a whole rack of pipe ends first and then cementing them is how the primer flashes off before the cement arrives.
Applying Cement: How Much, How Fast, Quarter-Turn

Apply cement to the pipe end first (a full even coat, extending 5 mm past the socket depth), then to the inside of the socket (a slightly thinner coat, covering the full engagement depth). Both surfaces must be wet with cement when they meet — a cement layer only on the pipe end and none in the socket welds one surface and leaves the other unfused.
Insert the pipe fully into the socket in a single push, then twist a quarter turn (90°) while pressing home. The quarter-turn distributes the cement evenly around the joint and prevents the socket-taper geometry from wedging one side to a thicker cement layer than the other. Hold for at least 30 seconds — the socket geometry has natural spring-back, and the cement's residual pressure will push the pipe out of the socket if you let go before the fusion sets.
A visible cement bead (a ring of extruded cement) should form around the socket rim as the pipe seats. No bead means insufficient cement — the joint is under-fused and will leak. A bead that runs down the outside of the pipe is normal on horizontal joints and does not need to be wiped off — it will cure hard and does not affect the fusion behind it.
Cure Times: Set, Handling, and Pressure Test
A solvent-welded joint reaches usable strength in three stages. Set time (typically 30 seconds to 2 minutes at 20 °C) is when the joint holds its own weight and will not push apart. Handling time (5-15 minutes) is when the joint can be moved or supported by hangers. Full pressure test time (24 hours at 20 °C, up to 72 hours at 5 °C) is when the joint reaches design strength and can hold rated pressure.
Temperature and humidity change everything. Below 5 °C, the solvent evaporates slowly and cure times triple. Above 30 °C, the working window collapses — apply and insert inside 15 seconds or the cement skins over. High humidity slows the solvent evaporation but does not stop the fusion, so damp weather extends cure without preventing it. In practical terms: schedule pressure tests for 24 hours after the last joint in warm-to-mild conditions, or 48-72 hours in cold weather. Do not test earlier — pressurising a joint that has not fully cured will separate it and hide the failure until service.
Approximate cure times by ambient temperature
| Ambient temperature | Set time | Handling time | Full cure (pressure test) |
|---|---|---|---|
| Below 5 °C | 2 – 5 min | 45 min | 72 h |
| 5 – 15 °C | 1 – 2 min | 30 min | 48 h |
| 15 – 25 °C | 30 – 60 s | 15 min | 24 h |
| 25 – 35 °C | 15 – 30 s | 10 min | 16 h |
Numbers are from typical solvent cement manufacturer datasheets for medium-body cement on DN75-DN160 joints. Heavier body cements take longer; larger diameters and cold-weather work push toward the upper end. When in doubt, wait — a 12-hour delay costs less than a rebuilt joint.
Rubber-Ring Bell-and-Spigot: When to Use It Instead

Not every uPVC drainage joint should be solvent-welded. On buried sewer mains, DN110 and larger, the modern default is a rubber-ring bell-and-spigot joint. The pipe carries a socket formed into one end, with a groove holding an EPDM (or NBR) elastomer ring; the spigot end of the next pipe pushes past the ring, and the ring compresses to form the seal. No cement, no cure time, no chemistry.
Two advantages drive the choice for buried applications. First: installation speed. A rubber-ring joint completes in seconds, versus 30-60 seconds for a solvent-welded joint plus 24 hours of cure. On a 500 m sewer main lateral, that is the difference between two shifts and five. Second: ground movement tolerance. A rubber-ring joint accommodates 5-10 mm of axial pipe movement and 1-2° of angular deflection at each socket — enough to survive soil settlement that would crack a rigid solvent-welded joint. Under EN 1610 for buried drainage installation, rubber-ring is the assumed joint type for pipes above DN200.
Solvent weld stays the default for interior DWV work, industrial process piping and any joint that must not leak under any pipe-movement condition. Rubber-ring wins for buried mains, sites with expected soil settlement, and any run over 100 m where install speed matters. Split the container: interior fittings for solvent weld, buried sewer for rubber-ring, ordered together.
The 6 Most Common PVC Installation Failures
Across IFAN's field-support record for PVC drainage callbacks, install failures on solvent-welded joints cluster around two patterns above all: joints assembled below 5 °C without an extended cure schedule, and pipe ends installed without the 15° chamfer prep. Between them they account for the majority of the leak reports the export team hears about — and both are prevented at the joint before the cement even hits the surface.

- Dry socket. Cement on the pipe end but not in the socket, or vice versa. The joint looks fine, welds one side, and fails from the un-cemented side on the first pressure spike.
- Un-chamfered pipe end. The raw cut edge pushes dissolved cement out of the socket during insertion. The socket-side surface is under-fused; the joint holds pressure but shears under pipe movement.
- Assembly-then-release. Installer releases the joint before the 30-second hold expires. Socket spring-back pushes the pipe partway out, and the cement cures in a compromised geometry.
- Wrong cement body. Regular-body cement in a DN160 socket sags and runs off before it dissolves the surface. Heavy-body cement in a DN25 joint over-fills and blocks the bore.
- Primer skipped in a code jurisdiction. Under IPC or UPC, unprimed joints fail inspection even if otherwise perfect. The purple stain is the evidence — no stain, no acceptance.
- Pressure test before full cure. A joint at 16 hours of cure holds handling loads but not rated pressure. Testing early separates the joint and starts a slow leak that only shows up in service.
Testing the System: Water, Air, Smoke
A completed DWV system carries three possible tests before the walls close. Water test: fill every stack and branch to the highest cleanout, hold 15 minutes, watch for any measurable drop. Air test: cap the system, pressurise to 34 kPa (5 psi), hold 15 minutes — any pressure drop below 33 kPa signals a joint leak. Smoke test (rarely on new work, common on retrofits): pressurise with theatrical smoke to visually trace leaks. Detailed test requirements sit under IPC Chapter 3 for interior work and EN 1610 for buried drainage.
One position: always run both water and air tests on any sealed DWV system, and time the test after full cement cure at ambient temperature. A water-only test holds under uniform head pressure; real drainage discharge creates vacuum spikes and back-pressure the water test does not reproduce. The air test catches the joints that would leak six months in service under those spikes.
Requirements vary by product, code jurisdiction and use case. For any project subject to inspection, confirm the required pressure, duration and test method with the local authority or a licensed plumbing engineer — the test protocol is enforceable, and passing a self-selected test is not evidence for the inspector.
What IFAN Solvent-Weld PVC Gives You

IFAN's uPVC / PVC Series is built for the installer's workflow — the joint prep, cement compatibility and socket geometry that decide whether a solvent-welded joint survives service. The range covers:
- Sockets machined to the standard taper — the 1° to 2° taper (per EN 1329) that lets the pipe end wedge without shoving cement out. Cheap fittings run a steeper taper that binds before the pipe seats fully.
- Solvent cement compatibility — the uPVC resin is compatible with all major third-party cements (Weld-On, Oatey, Tangit, RectorSeal) — no proprietary chemistry lock-in.
- Rubber-ring bell fittings — for buried sewer runs DN110+, factory-formed sockets with EPDM ring grooves that seat the ring without extraction on assembly.
- Batch-traceable QC — the same per-shipment inspection protocol described in the PPR quality control checklist applies to the uPVC range: OD, wall, ovality, socket geometry, and material tests per sample.
- Container mix by installation type — solvent-weld interior fittings and rubber-ring buried fittings can be ordered together, sized against the drainage pipe sizes guide and laid out per the DWV design guide.
Third-party inspections from SGS, Bureau Veritas or TÜV are welcomed on any uPVC order — booking at loading catches socket-geometry drift before it reaches the site.
Conclusion
A PVC installation that survives 30 years follows a specific chain of decisions: correct cement body for the diameter, square-cut and chamfered pipe end, primer where code requires it, cement on both surfaces, quarter-turn insertion, 30-second hold, cure at temperature, then the double water-and-air test before the walls close. Skip any of them and the joint passes hydro test and leaks in service; get all of them right and the joint outlives the building.
Before the crew starts the run, walk the plan against the six failure modes above and set the cement and cure schedule around the actual site temperature. Pair the installation discipline with the sizing spec from the PVC drainage sizes guide, the layout from the DWV design guide, and the material choice from the PVC vs concrete vs HDPE comparison, and the system that leaves the site is one that quietly does its job for the life of the building.
Frequently Asked Questions
How long does PVC cement need to dry before pressure testing?
24 hours at 15-25 °C for a full pressure test. Cold weather (below 5 °C) extends this to 72 hours; hot weather (above 30 °C) shortens it to about 16 hours. Handling time is 15 minutes at normal temperature.
Do I need purple primer on PVC joints?
Under US IPC and UPC codes, yes — every PVC solvent joint on a plumbing system must be primed, and the purple dye is the inspector's evidence. European codes recommend but do not universally require primer; use it anyway for reliable fusion in cold conditions.
Can I use CPVC cement on PVC pipe?
No. CPVC cement is formulated for a different resin and does not dissolve PVC surfaces effectively. It appears to work — a joint holds under handling — but the fusion is thin and shears under service loads. Use dedicated PVC or all-purpose cement on PVC pipe.
Why does my PVC joint leak after passing the initial test?
Most late-failure leaks trace to un-chamfered pipe ends (socket-side under-fusion), dry sockets (cement only on the pipe), or pressure testing before full cure. All three pass the initial water test and fail on service pressure spikes weeks or months later.
Is solvent weld or rubber ring better for PVC sewer pipe?
For buried sewer main DN110 and larger, rubber-ring bell-and-spigot wins on speed and ground-movement tolerance. For interior DWV, industrial pipe, and any joint that must survive pipe stress without leaking, solvent weld is the default.
What's the difference between regular, medium and heavy body PVC cement?
Regular body (400-800 cP) wets thin joints — DN20-DN75. Medium body (800-1,600 cP) handles DN75-DN160 DWV work. Heavy body (1,600+ cP) stays put on DN160+ vertical sockets without sagging. Match the cement to the diameter.
Related Briefings
The Complete Guide to PVC Drainage Pipe (uPVC): Sizes, DWV Design, Sewer Sourcing & Installation
PVC vs Concrete vs HDPE for Sewer Mains: A Municipal Buyer's Guide